Looks like there's an question mark (?) behind the star, especially on the smaller one.

It's supposed to be the flag/banner. Unfortunately, if I made it more obvious it was a flag, the icon gets a little messy, so I kept it more abstract.
stuff
Definitely! I was already planning on a unique Pioneer icon. I'm pretty happy with the Soviet engineer icon I made, but I haven't thought of any amazing ideas for Ostheer yet. If you have any neat ideas for one, we can discuss through PM's.
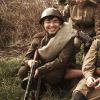
Also, those are some interesting portraits. My issue with using them is that they lack the shredded parchment edges that currently, all portraits (including UKF and WFA) use. I could probably just work around that though with a feather selection, though, but if you have versions that include the paper look around the edges that'd save some time transitioning.
Since I'm already quoting you, did you have a recovered portrait for Jaeger Light Infantry/Stormtrooper? |
|
Although I don't quite play Firestorm Doctrine, I could give you a couple of pointers on the early game rush.
My early game strategy has served me alright in 2v2s and in 1v1s (~55-60% WR), and it revolves around the kubelwagen and a pair of sturmpioneers. I have both the mobility bulletins for kubelwagen and a third bulletin that changes from time to time, but is usually either a PzIV or JpzIV bulletin.
I tend to min/max and play very aggressively in the early game, and my build order is always kubel -> volks -> sturm -> volks -> truck. With a total 9% increased movement, 5% increased accel, and built right at the start of the game, the kubel can rush fuel while your pioneers capture the territories leading up to it.
0) Before you finish loading, hover over F1 and W (min/max)
1) Send your pios to the closest point between base and desired fuel point
2) Set rally point to fuel before kubel is out. Queue your volks.
3) After kubel is out, set rally point to another neutral resource point
During this time, if you feel like min/maxing, you can closely monitor your sturms capping and start moving them before cap finishes so they can capture it while walking out of it. As your kubel makes a beeline for fuel, your pios should be also eventually headed toward fuel. Generally, the kubel will either capture or partially capture the point when enemy forces move in on it, and your pioneers haven't reached the cap point yet. Just let the kubel sit and engage (unless there is an MG) and stall until your pios can catch up to it. Pull the kubel back for a bit and let your sturms mop the floor against a weakened enemy squad. Afterward, you can repair your kubel as if nothing ever happened and send them to rush another point in the same fashion. Keep in mind that, while this will not always work perfectly, when micro'ed well it is capable of forcing the enemy to either overcommit to your kubel + pios allowing you to cap other points or to force their forward cappers to retreat, also buying you time.
4) By the time the engagement with the enemy starts, you should have 1 sturmpio, 1 kubel, and 1 volks. The volks should be capping a point via rally point. Feel free to use them in either way, as combat troops or as your cappers, as the situation requires. You should also be able to queue up your next sturmpio squad
4.5) You can choose to set the rally point to another neutral point if you wish. Queue up the 2nd squad of volks.
5) By the time your 2nd volks comes out, you should have enough staying power and unit variety to invest in a truck. Play from there.
A few other tips:
Thorough salvage allows you to get 15 (I think) munitions from any weapon or vehicle wreck in addition to the base 5 fuel. Because this is a munitions-heavy doctrine, this can be very helpful if you have a squad of volks or sturms to mop up after every battle.
The volks can save their StG upgrades for later. As Firestorm, you'll want to keep munitions for your flamethrower and grab that ASAP as the shock value of the flamethrower is most noticeable in the early game when players are scrambling for key buildings. You'll want some form of longer-range damage other than the kubel's crappy MG. In addition, if your flamethrower gets forced off, you still have anti-garrison.
Don't go overboard on the flamethrowers. You want at least either one squad with a shrek or a puppchen to deal with clown car or UPC. I tend to keep a pair of pioneers, one upgraded with shrek, and one without for anti-infantry. In this case, the dedicated anti-infantry squad receives the flamethrower. Of course, I'm not saying you should limit yourself to 1 flamethrower, but sturms are expensive, and you'll want the ability to engage at least light armor with something.
Recoup losses is great for big fights, as it eases your reinforcement costs. It gives 20 manpower per infantry model (doesn't matter what kind of infantry) lost for 30 seconds. Use it often when the game heats up as it allows you to be even more aggressive with your infantry play, knowing that losses hurt only fractionally.
The flammpanzer is good for blobs and dislodging defenses, and unlike the 251 flamethrower can wade through all small arms fire and to a point bofors fire relatively unharmed. It's very weak to AT, as one would expect. If you are fortunate enough to steal a mortar, you could use the smoke to great effect in making sure the flammpanzer can close the distance if there are AT guns in play. Alternatively, in team games, a well-coordinated OKW assault artillery or OKH mortars can be just as useful. If needed to attack something behind the protective smoke, don't forget there is always attack ground.
I would recommend investing in some form of AT in the mid game more than just a sturm with shreks, since keep in mind that the flammpanzer costs 100 fuel, which will hurt your chances of getting medium armor out at the same time as your opponent. I would also recommend JgdPz IV as the first item choice from PzHQ, because it is quite likely at that point your opponent has some form of medium or heavy armor, maybe more than one. Rounding out your unit selection with dedicated AT helps keep him on his toes when engaging your flammpanzer with armor.
The Stuka barrage is useful because it's a circular pattern, and saturation fire is something OKW lacks. Oddly enough, the firing sounds like a Katyusha or Panzerwerfer barrage instead of a Stuka barrage, which may make it less obvious in a team game.
Hope my experiences has helped! |

 United States
 China
China


 cblanco ★
  보드카 중대
  VonManteuffel
  Heartless Jäger