How to make a custom loading picture!
26 Aug 2014, 07:01 AM
#1
Posts: 108
Hi I have been reading a lot on this great site and there are a lot of good inputs to how to get a custom loading picture/screen.
This is what I have done.
I have choose a picture and then saved it as TGA at 24-bit in Photoshop.
Then I have given the file the mapname_loading_background, and put the file in the folder where my map is.
Then I loading the map in worldbuilder and Export it , this should as far as I can see get the picture in the loading screen.
But, nothing happens. ...still standard loadingscreen for custom maps.
Can anybody help me out here, is there something that I have missing.
Question, should the picture have the same name as the mapname.sga or as mapname.mm, the mapname.SGA is the map you load in worldbuilder and the mapname.mm is the name you give the map with in worldbuilder, and that is the name that you can see on steam.
26 Aug 2014, 13:05 PM
#2
2
Posts: 2181
SGA files are completely separate from all the other files, it is basically a zip file containing all the single files and is the finished product. Renaming this does not affect anything.
So your loading background should have the name: <mapname>_loading_background.DDS
In the latest relic maps I exported they changed the loading background file from TGA into DDS, I dont know if TGA still works but I would use DDS just in case.
Here is the naming of one of relics official map for example to see how they do it.
18 Aug 2018, 05:36 AM
#3
Posts: 2145 | Subs: 2
ROSBONES HOT TIP #1
To make a cool fake depth blurred screenshot do the following:
1. Setup a scene in the worldbuilder. Place objects like tanks, planes, etc from the EPBS\Races folder on your map. DO NOT SAVE! I am using my map Novgorod Outskirts for this example.
2. Adjust the camera view to get a cool shot. Press CTRL+F3 to take a screenshot. The image will be in your COH2 screenshots folder.
3. Now select to view the depth buffer in the menu. DO NOT MOVE THE CAMERA VIEW! Press CTRL-F3 to take a screenshot of the Z depth buffer.
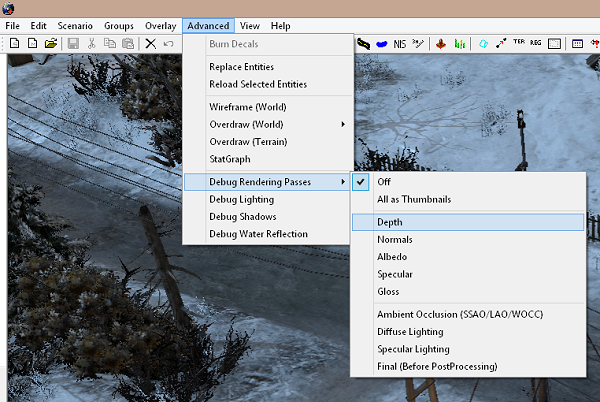
You should now have two screenshots: Raw and Depth.
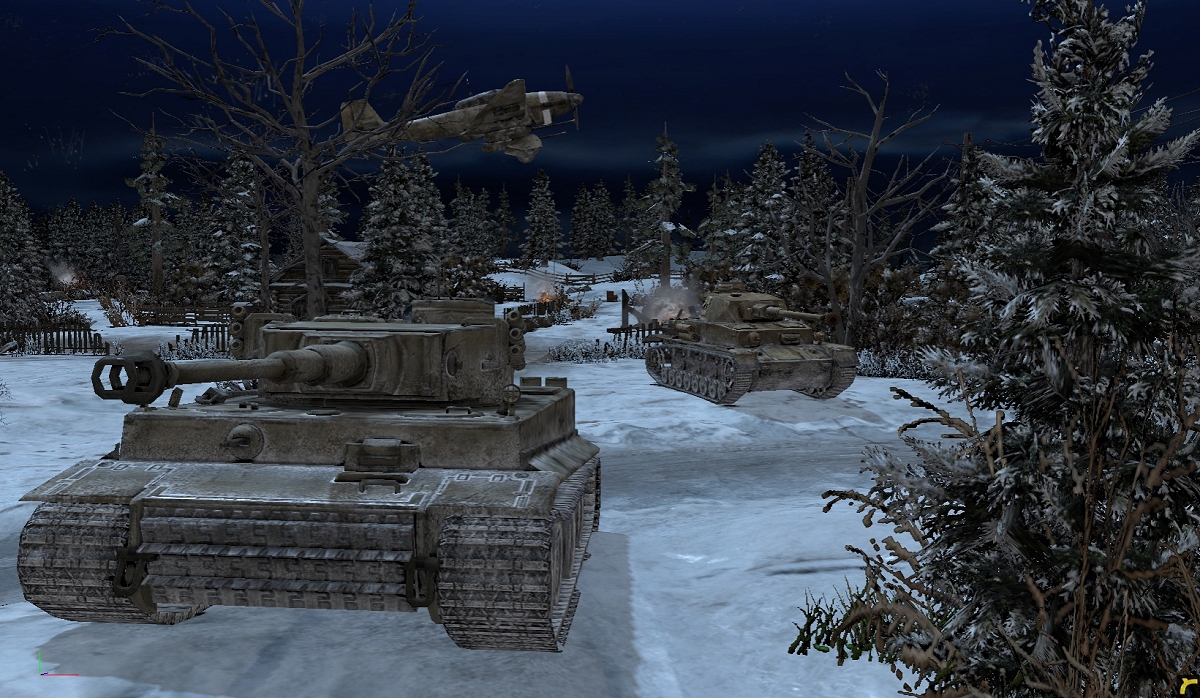
4. Open the images in a good photo editing program with layer support(Photoshop, Gimp, etc). You will want to adjust the histogram(Contrast/Brightness/Gamma) of the DEPTH image to get the white sections as white as possible and the dark sections as dark as possible.
5. Make a copy of the RAW image and make it the top layer of the raw image. Now apply some BLUR to this new copy. We will call this image BLUR from now on.
6. Next create an alpha blend mask for the BLUR layer. Use the DEPTH image as the mask.
You should now have something like this:
You can flip the blur distance by inverting the BLUR layers mask (Negative image).
You can adjust the BLUR layers mask histogram to adjust the blur effect. Or adjust the mix value of the layer.
Once you are started you can try all kinds of fun stuff like blurring the alpha layer mask, etc. There are also more options to view in the worldbuilder like SPECULAR, GLOSS, etc. You now can add all kinds of shine to your images.
EDIT(08/25/2018):
7. You can add fog to your image by making a copy of the DEPTH layer. Set it to the top layer and mix it as SCREEN or HARD LIGHT. You may need to invert the colors. You can colorize the layer for different colors, etc. Again adjust the histogram(Gamma) to get just the right fog effect.
NOTES:
- Dont forget to clone tool out the RELIC logo and 3 axis gizmo indicator.
- nVidia control panel allows you to override the worldbuilder video card settings and force stuff like anti-aliasing for better quality shots. I have not tested AMD video cards.
To make a cool fake depth blurred screenshot do the following:
1. Setup a scene in the worldbuilder. Place objects like tanks, planes, etc from the EPBS\Races folder on your map. DO NOT SAVE! I am using my map Novgorod Outskirts for this example.
2. Adjust the camera view to get a cool shot. Press CTRL+F3 to take a screenshot. The image will be in your COH2 screenshots folder.
3. Now select to view the depth buffer in the menu. DO NOT MOVE THE CAMERA VIEW! Press CTRL-F3 to take a screenshot of the Z depth buffer.
You should now have two screenshots: Raw and Depth.
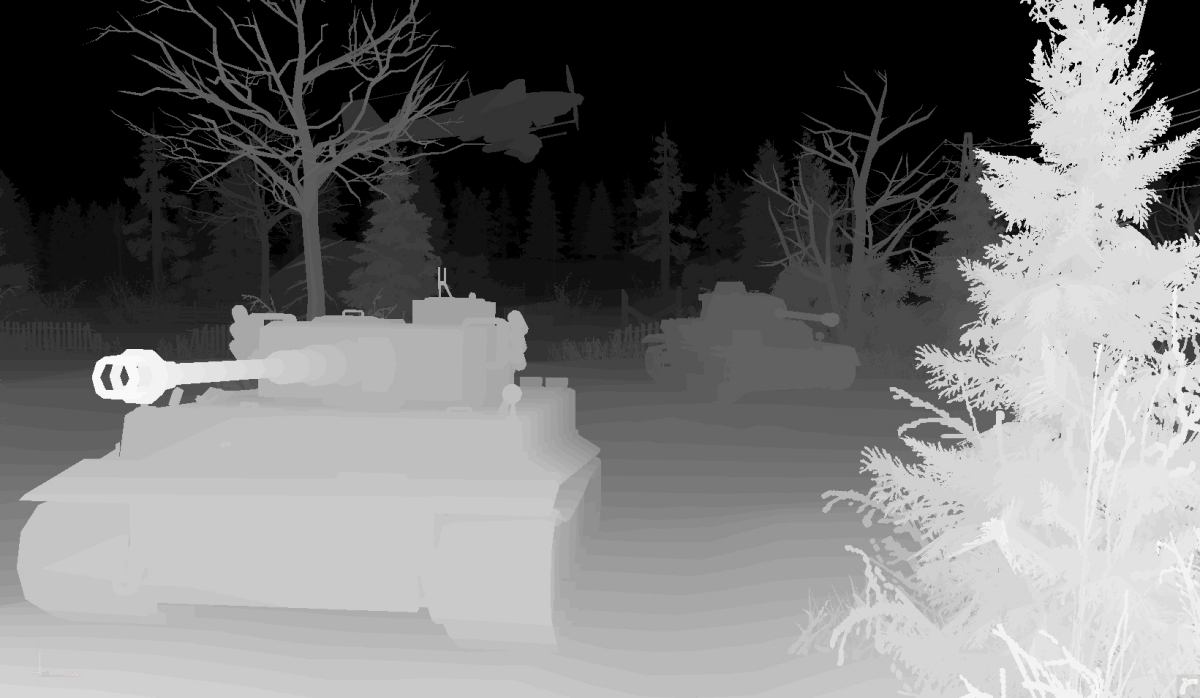
4. Open the images in a good photo editing program with layer support(Photoshop, Gimp, etc). You will want to adjust the histogram(Contrast/Brightness/Gamma) of the DEPTH image to get the white sections as white as possible and the dark sections as dark as possible.
5. Make a copy of the RAW image and make it the top layer of the raw image. Now apply some BLUR to this new copy. We will call this image BLUR from now on.
6. Next create an alpha blend mask for the BLUR layer. Use the DEPTH image as the mask.
You should now have something like this:
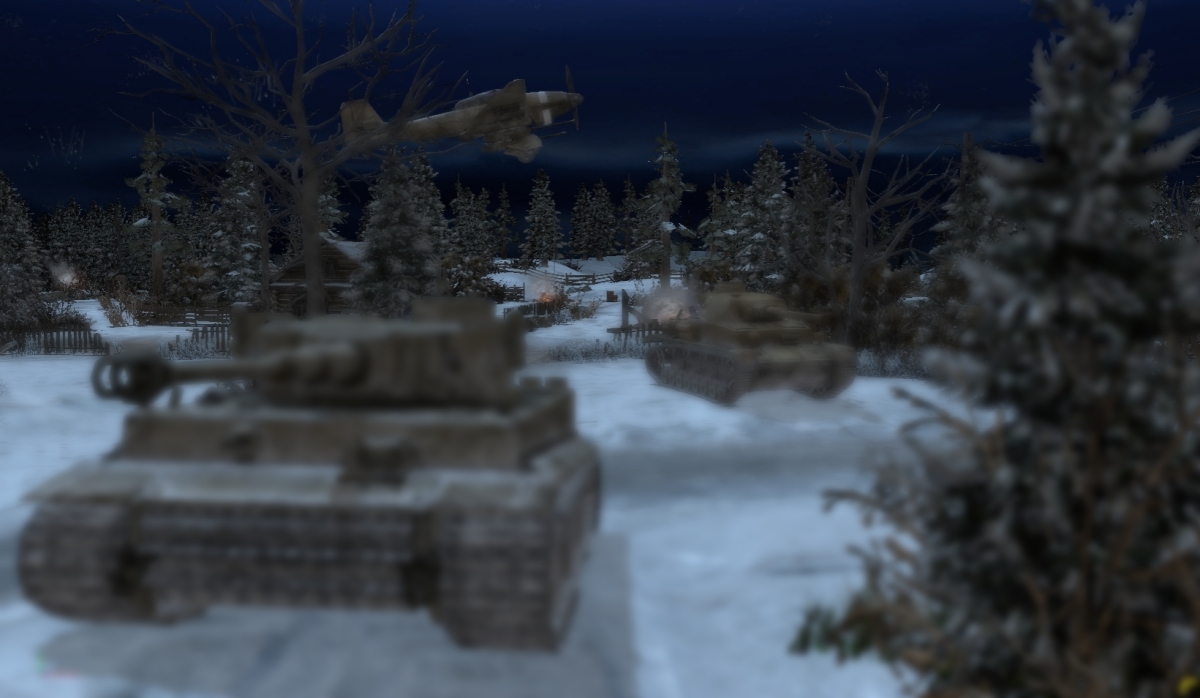
You can flip the blur distance by inverting the BLUR layers mask (Negative image).
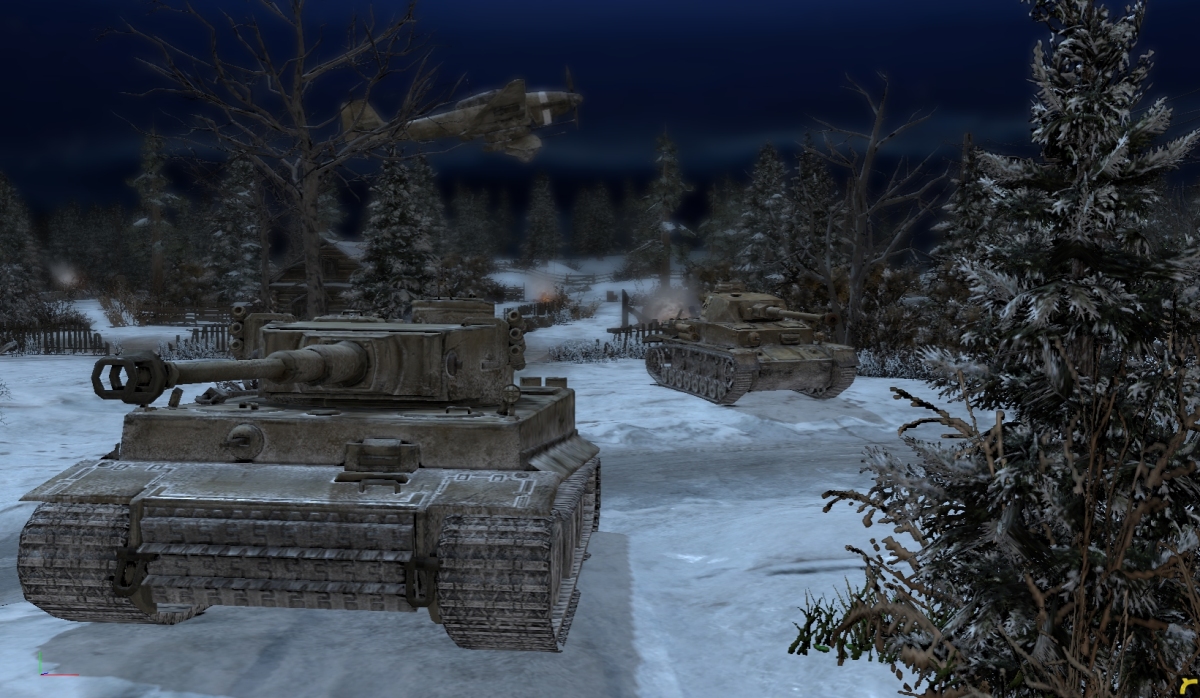
You can adjust the BLUR layers mask histogram to adjust the blur effect. Or adjust the mix value of the layer.
Once you are started you can try all kinds of fun stuff like blurring the alpha layer mask, etc. There are also more options to view in the worldbuilder like SPECULAR, GLOSS, etc. You now can add all kinds of shine to your images.
EDIT(08/25/2018):
7. You can add fog to your image by making a copy of the DEPTH layer. Set it to the top layer and mix it as SCREEN or HARD LIGHT. You may need to invert the colors. You can colorize the layer for different colors, etc. Again adjust the histogram(Gamma) to get just the right fog effect.
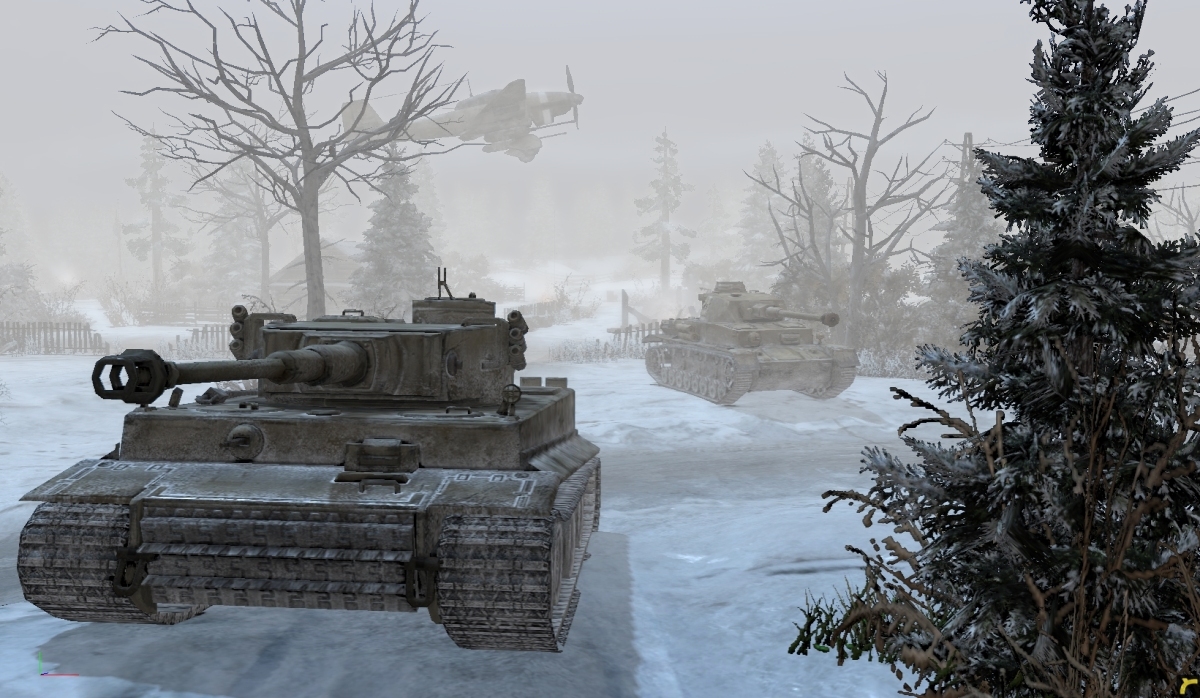
NOTES:
- Dont forget to clone tool out the RELIC logo and 3 axis gizmo indicator.
- nVidia control panel allows you to override the worldbuilder video card settings and force stuff like anti-aliasing for better quality shots. I have not tested AMD video cards.
18 Aug 2018, 23:31 PM
#4
Posts: 20
So I'm having a unique problem with loading screens. I've attempted to make my own custom loading screen through Gimp but as soon as I get into game the loading screen appears black and I can see a vague pop-up message repeatedly appearing and closing as the map attempts to load. At this point the map fails to load and leaves me on the black screen permanently until I force close the game. The map works just fine otherwise when the custom background is removed.
I'm not entirely sure what I'm doing wrong. So far I've tried a slew of different approaches (dds and tga, different resolutions, simple flat color images) but every time it fails. I'm assuming I failed to do something necessary in Gimp with the images for them to correctly be interpreted and I'd like some advice on what I possibly could have missed that could be causing this problem.
Thanks!
19 Aug 2018, 00:10 AM
#5
Posts: 2145 | Subs: 2
So I'm having a unique problem with loading screens. I've attempted to make my own custom loading screen through Gimp but as soon as I get into game the loading screen appears black and I can see a vague pop-up message repeatedly appearing and closing as the map attempts to load.
Generically most people use 1920x1080 pixel, 24-bit TGA (ie No alpha channel). TGA can be compressed or uncompressed. Again, I only ever see UNCOMPRESSED images. The code to load an uncompressed TGA is very easy, that is why most games use it.
EDIT:
I will have to try some other types and see what happens...
- TGA 24 bit Uncompressed - WORKED
- TGA 24 bit Compressed - WORKED
- TGA 16 bit Uncompressed - Black screen on load. Game loaded and played ok.
DDS has too many options to test. I am not sure I would ever feel good about DDS working unless Relic has it posted what version to use. I have seen a map that was saved as DDS with DXT1 that works.
Approximate file sizes for 1920x1080 image:
- TGA 24 bit uncompressed 6.0 MB
- TGA 24 bit compressed 5.6 MB
- DDS using DXT1 compress 1.1 MB
19 Aug 2018, 01:04 AM
#6
Posts: 20
Thank you! I was primarily attempting to use DDS files seeing as all the other map related files in the folder are DDS. With a little further experimenting with TGA's I eventually got it to work.
Also I quite like that depth of field effect tutorial you posted, I'm pretty green to image editing and am adopting a learn as I go policy so having practical effects to learn from is incredibly helpful!
PAGES (1)
1 user is browsing this thread:
1 guest
Livestreams
22 | |||||
19 | |||||
14 | |||||
2 | |||||
1 |
Ladders Top 10
-
#Steam AliasWL%Streak
- 1.831222.789+37
- 2.34957.860+14
- 3.589215.733+4
- 4.1101614.642+2
- 5.305114.728+1
- 6.916405.693-2
- 7.271108.715+22
- 8.721440.621+3
- 9.1041674.607-2
- 10.17146.788+1
Replay highlight
VS
- cblanco ★
- 보드카 중대
- VonManteuffel
- Heartless Jäger
Einhoven Country
Honor it
9
Download
1231
Board Info
943 users are online:
943 guests
2 posts in the last 24h
8 posts in the last week
39 posts in the last month
8 posts in the last week
39 posts in the last month
Registered members: 49080
Welcome our newest member, Keensler
Most online: 2043 users on 29 Oct 2023, 01:04 AM
Welcome our newest member, Keensler
Most online: 2043 users on 29 Oct 2023, 01:04 AM