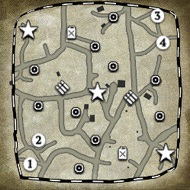
To get the Worldbuilder running look in your COH2 directory and/or read this post:
https://www.coh2.org/topic/10593/worldbuilder-basic-information-by-relic
CREATE THE MAP
1) File -> new multiplayer map.
2) In the file dialog, create a folder to hold your map in the default map area. Usually C:\Program Files (x86)\Steam\steamapps\common\Company of Heroes 2\CoH2\Data\scenarios. You can probably put the the files anywhere but the worldbuilder may default to here in most cases.
3) Enter generic a map name like 2p_Crossup. Use this for the folder and map name. The in-game name is entered later in the worldbuilder.
4) Enter terrain size of map and subtract 32 meters for playable area. Select GENERATE STARTING POSITIONS.
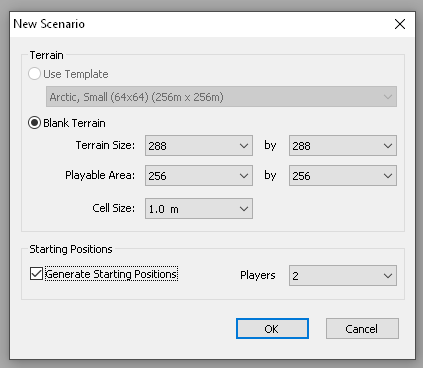
5) A generic map will be made with 2 bases etc. Move the bases to the area you want them and move the premade base points to the middle of the base pizzas. It helps to turn on the 32x32 grid overlay in the main menu.
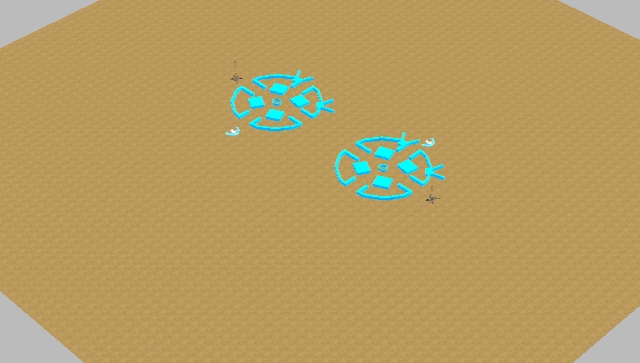
NOTE: Height, rotation, etc keystrokes are on the lower left status bar for each mode you are editing. Example: Hold down H when moving an object to adjust its height. Press R on objects and you can rotate them using the 3 axis gizmo lines like a pro.
6) Go to objects on toolbar. Then navigate in right panel obj list to EPBS\GAMEPLAY. In this list are the game objs like bunkers and points.
7) Find territory_point_mp and place 10 on the map.
8) Find territory_fuel_point_mp place 2 on map.
9) Find territory_munition_point_mp place 2 on map.
10) Find victory_point place 3 on map.
11) Find BUNKER_MARKER and place 3 by each base.
12) Optionally you can place a DEFAULT_RALLY_POINT by each base that units will move to when spawned.
13) If you are making a TEAM GAME map you will need to define the players under SCENARIO -> TEAMS on the main menu.
14) Select TER on toolbar.
15) On right panel select CALCULATE VORONOI.
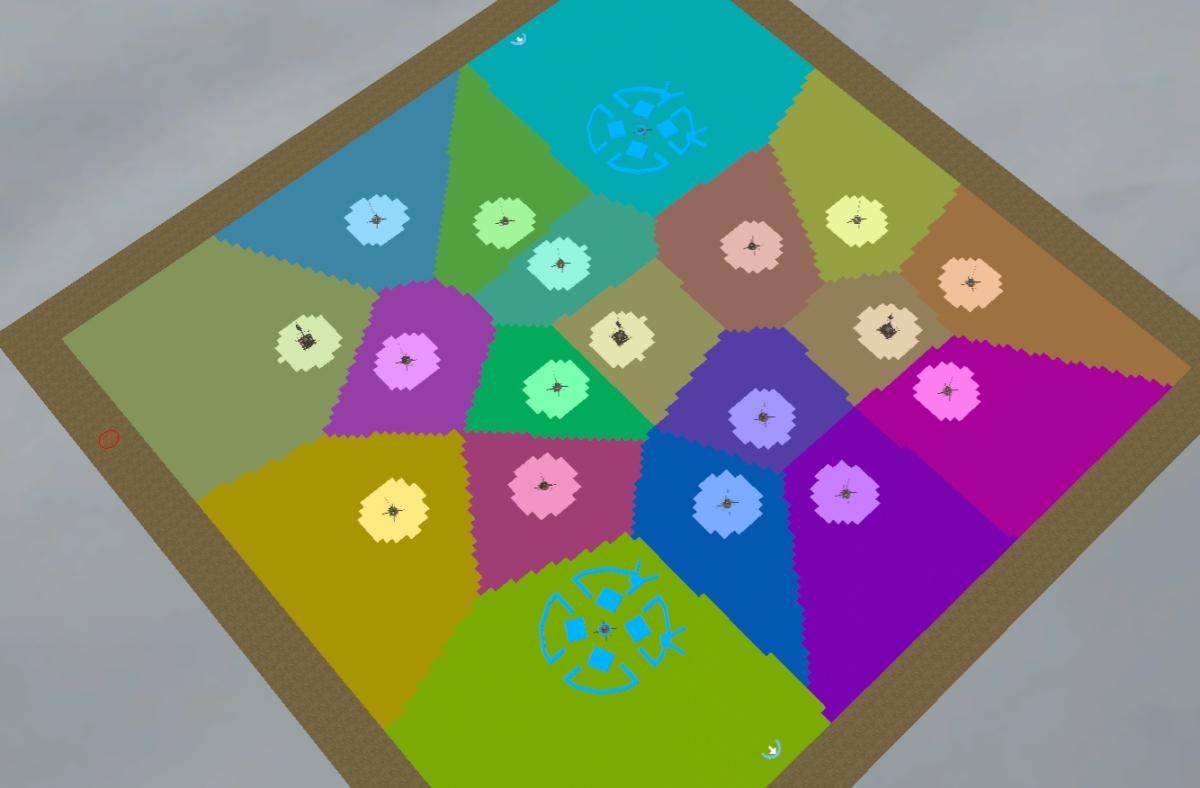
OBJECTS
At this point you should have a map with territories.
From here you will want to place objects like houses, bushes etc.
Go back to OBJECTS but use EPBS\ENVIRONMENT. Houses etc are in ART_AMBIENT and trees etc are in ART_NATURE. Start plopping stuff on map.
DO NOT USE LARGE TREES anywhere you want vehicles to move. They are indestructible.
TIP: I like to use GROVE and HEDGE objects and start to create/draw areas with them. Later I switch them out to other objects if necessary. You can do anything here from randomly placing objects to turning on the GRID overlay and attempting to place objects exactly where they would be in real life from a photo etc.
TIP: If making a map for automatch, you may want to limit the number of buildings. There are almost no maps that have more than a few buildings in game.
TIP: If making a map for automatch, you may want to make major engagement areas at least 50m wide/long or close quarter units will be OP and the map will be unbalanced.
- all objects are placed as WORLD ownership. Meaning no player owns these. When editing your base area you will need to set ownership to the player that will be using that base.
- Use CURRENT -> PLAYER ASSIGNMENT to select who owns bases, bunkers, starting positions, etc.
- You can set all bunkers and starting positions to the first player of the team etc. Ex: 3v3 map all objects except base pizza and rally points are player 1 and player 4 for the enemy base.
TERRAIN HEIGHT
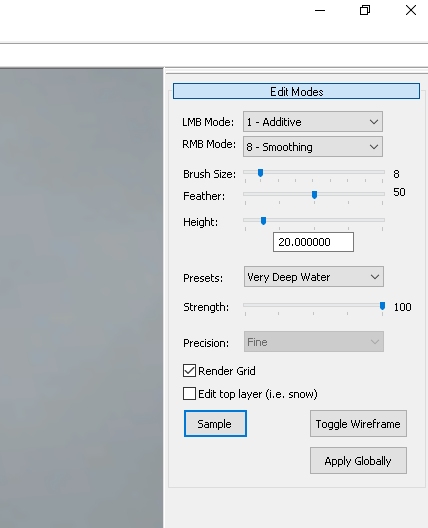
- Select the HEIGHTMAP EDITOR from toolbar.
- Set the BRUSH SIZE and STRENGTH. Start painting.
- You can set each mouse button to either ADD, SUBTRACT, SMOOTH, or be a SET HEIGHT (good for roads, railroads, etc). You can also sample terrain height and it will default to that height.
WATER
- If you want to put some water, edit the terrain to be low where you want water.
- Select WATER PLACEMENT from toolbar. Enter WATER LEVEL (can sample in heightmap editor).
- Right click in a low spot where water will exist.
- Every water source may decrease your frame rates, so try to only have one max in most areas.
- You can adjust the water surface textures, colors, and depth/height to get the water to be clear or murky and dark etc.
TERRAIN PAINTING
The thing that makes a map look real is the variety and randomness of textures on the terrain.
The ground can be painted several ways:
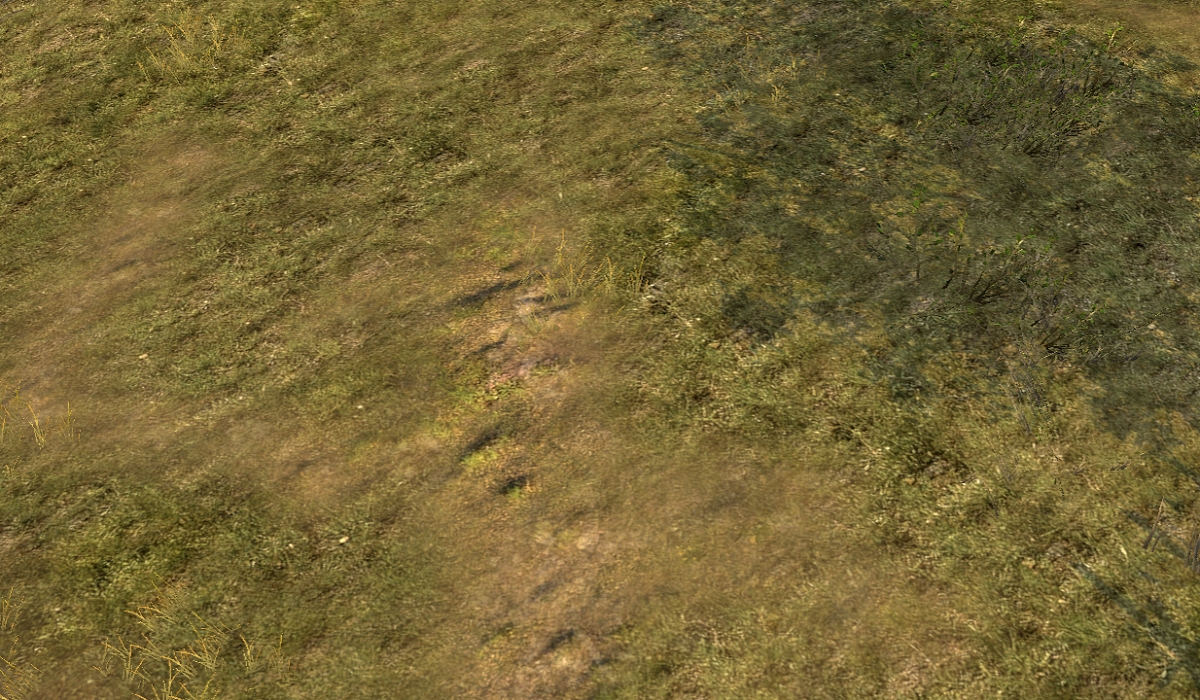
- You can use the TILE editor and actually paint textures on the ground. These textures are always the same size, color, and orientation and are good for the base look of the map.
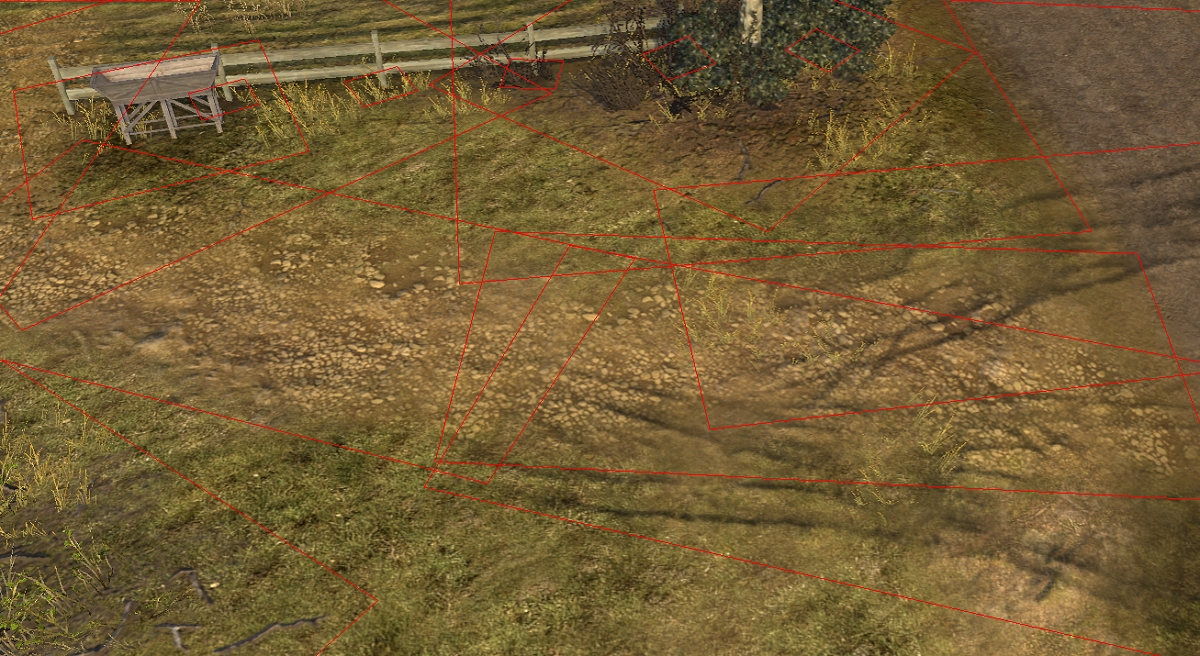
- You can use splats. Which are textures you place one at a time. You can then scale and rotate them. Splats are used for the all important randomness of the terrain. Scaling and color change creates all kinds of natural looking random variety.
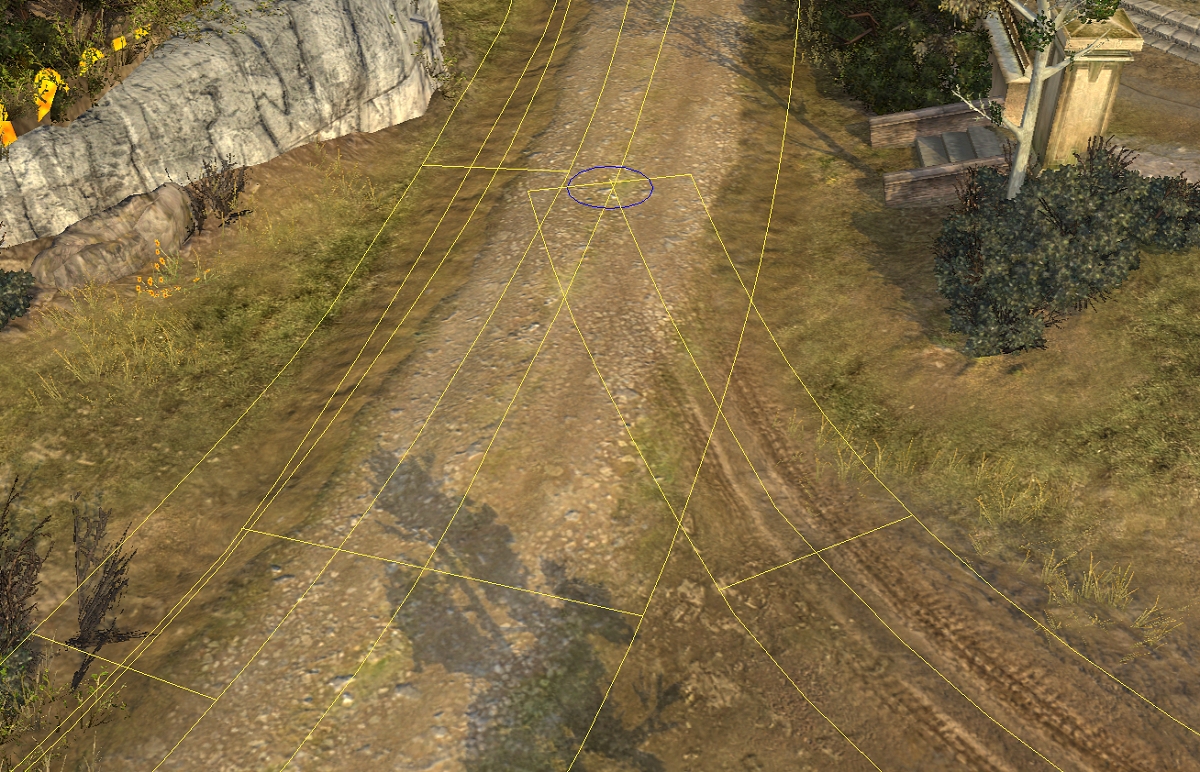
- You can add spline textures. Splines are long bezier curved objects. They can be textures or even objects such as walls and hedges. Splines are key for things like roads, ditches, farm areas, etc because the textures are seemlessly draw together in long lines. The ends of the spline are also alpha blended (see thru) so they do not end abruptly and can be blended with more splines.
TILES
- Never paint more than 8 tile textures per 32 meter CHUNK. You can toggle chunk and count pverlays in the dialog area.
- When painting set the Brush size and strength to achieve gradual results that blend. strength is usually like 20 or so.
- The first texture is painted over the entire map, so use one that will be most of the map. If a city use a dirt or cement. If woods use grass or dirt.
SPLATS
- Are the same textures as TILE, but you can rotate, scale, and color them.
- After placing a splat use the CURRENT color and opacity to blend the splats.
SPLINES
https://www.coh2.org/guides/10390/worldbuilder-the-spline-tool-in-detail
- Are used for walls, roads, groups of bush objects, can even adjust terrain elevation.
- Select the SPLINE mode at the top of the right panel. If doing OBJECTS you need to set some stuff up then select the DEFAULT checkbox (bug).
- You may want to watch a tutorial.
- Textures - select texture. Then right click four places on the map. Each click creates a control point. Press enter when done.
- Objects - Operates the same way when placing, but you need to define the objects and also set if it will be WALL MODE and if you want to adjust the height manually or have it ADJUSTABLE TO TERRAIN (default).
GRASS EDITOR
- The grass editor lets you select different plants and grasses and paint them on the terrain as 3D objects.
- I do not know of any limitations, just remember it takes time to draw these objects and your maps FPS will take a hit.
ADJUSTING TERRITORY
- Select TER from toolbar.
- Select a brush size. Start with 5. Press SAMPLE and then click on the map territory you want to adjust. The territory will change color to white/light grey. You can now paint the new area.
- You can adjust the capping area or the territory. Capping area is usually about 20-25 meters wide. Can set brush to 22 and click.
BASE SETUP
- The base territory will need to be adjusted. Make your base big enough that you can have the base pizza, mg bunkers, and get tanks around. the base territory should be painted off the playable area so call in units can come in from off map.
- Place the MAP_ENTRY_POINT in the map territory but out of bounds. It must be in the base territory.
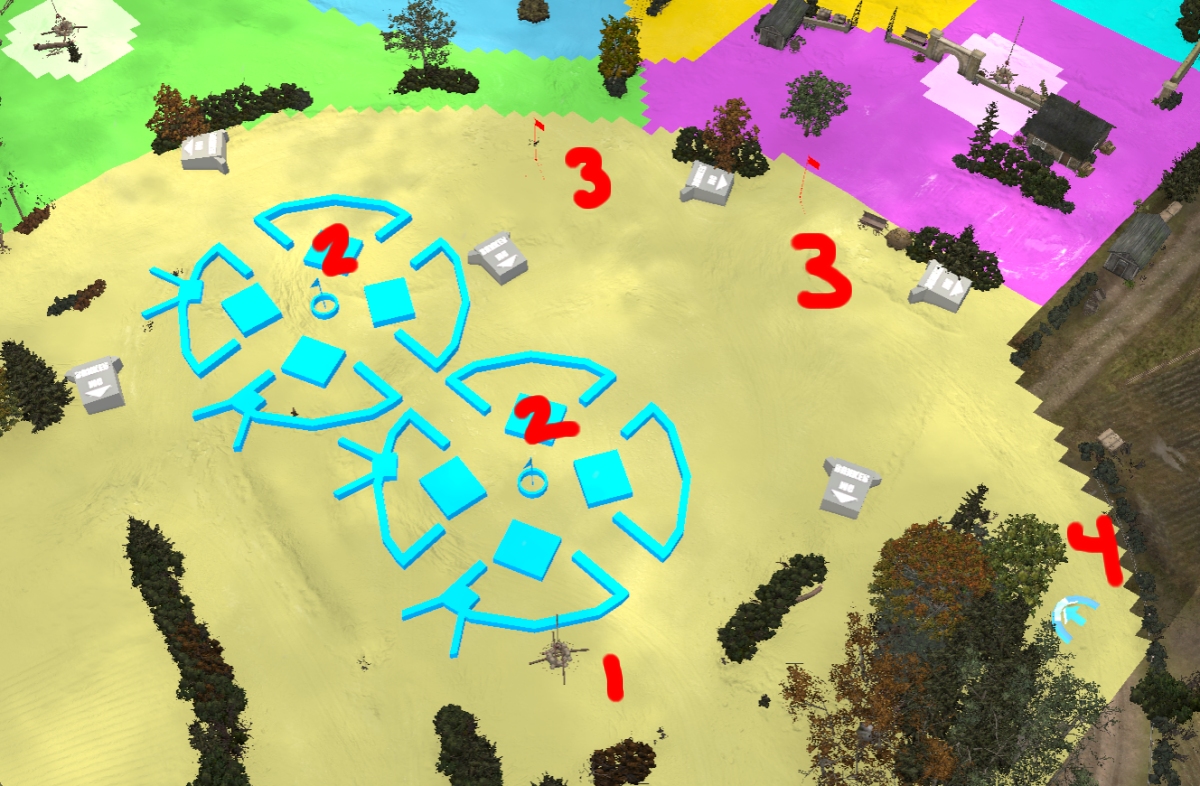
1) STARTING_TERRITORY_TEAM object indicates this area is a base area.
2) STARTING_POSITION_SHARED_TERRITORY objects.
3) DEFAULT_RALLY_POINT objects.
4) MAP_ENTRY_POINT objects.
MAP NAME
On the main menu select SCENARIO -> SCENARIO PROPERTIES. The first line of the dialog will be the IN-GAME MAP NAME. Enter something like (2) Crossup.
SAVE YOUR MAP
- You should try to save frequently while editing. However, if your territory is not setup correctly, the map will not save.
- You Save your map on the toolbar disk icon. Do not use shortcuts or the main menu save as it does not save correctly sometimes.
- Saving only saves the files needed to edit the map. Now select FILE -> EXPORT PACKAGE to actually create a zipped up version of the map files that COH2 actually uses to play on.
- The exported SGA file will be where COH2 normally stores your maps. Usually under MODS\SCENARIOS in your DOCUMENTS\MY GAMES folder.
- The map should now be playable in COH2 under the CREATE CUSTOM GAME section.
--------------------------------------------------------------------------------------
ADVANCED CONCEPTS
MAP LIGHTING AND WEATHER EFFECTS
- This section is under menu item SCENARIO -> ATMOSPHERE SETTINGS. There are too many to cover here but the map lighting, fog, etc are setup here. You can select some RELIC premade settings under PRESET control group -> LOAD and adjust to your liking from that starting point.
INTERACTIVITY STAGE
- The Interactivity Stage (IS) Editor tells units to avoid these areas.
- Paint the entire out of bounds area with the IS editor on the toolbar.
- Set Out of bounds (OOB) areas to IS value of 50. Game play areas are value 0.
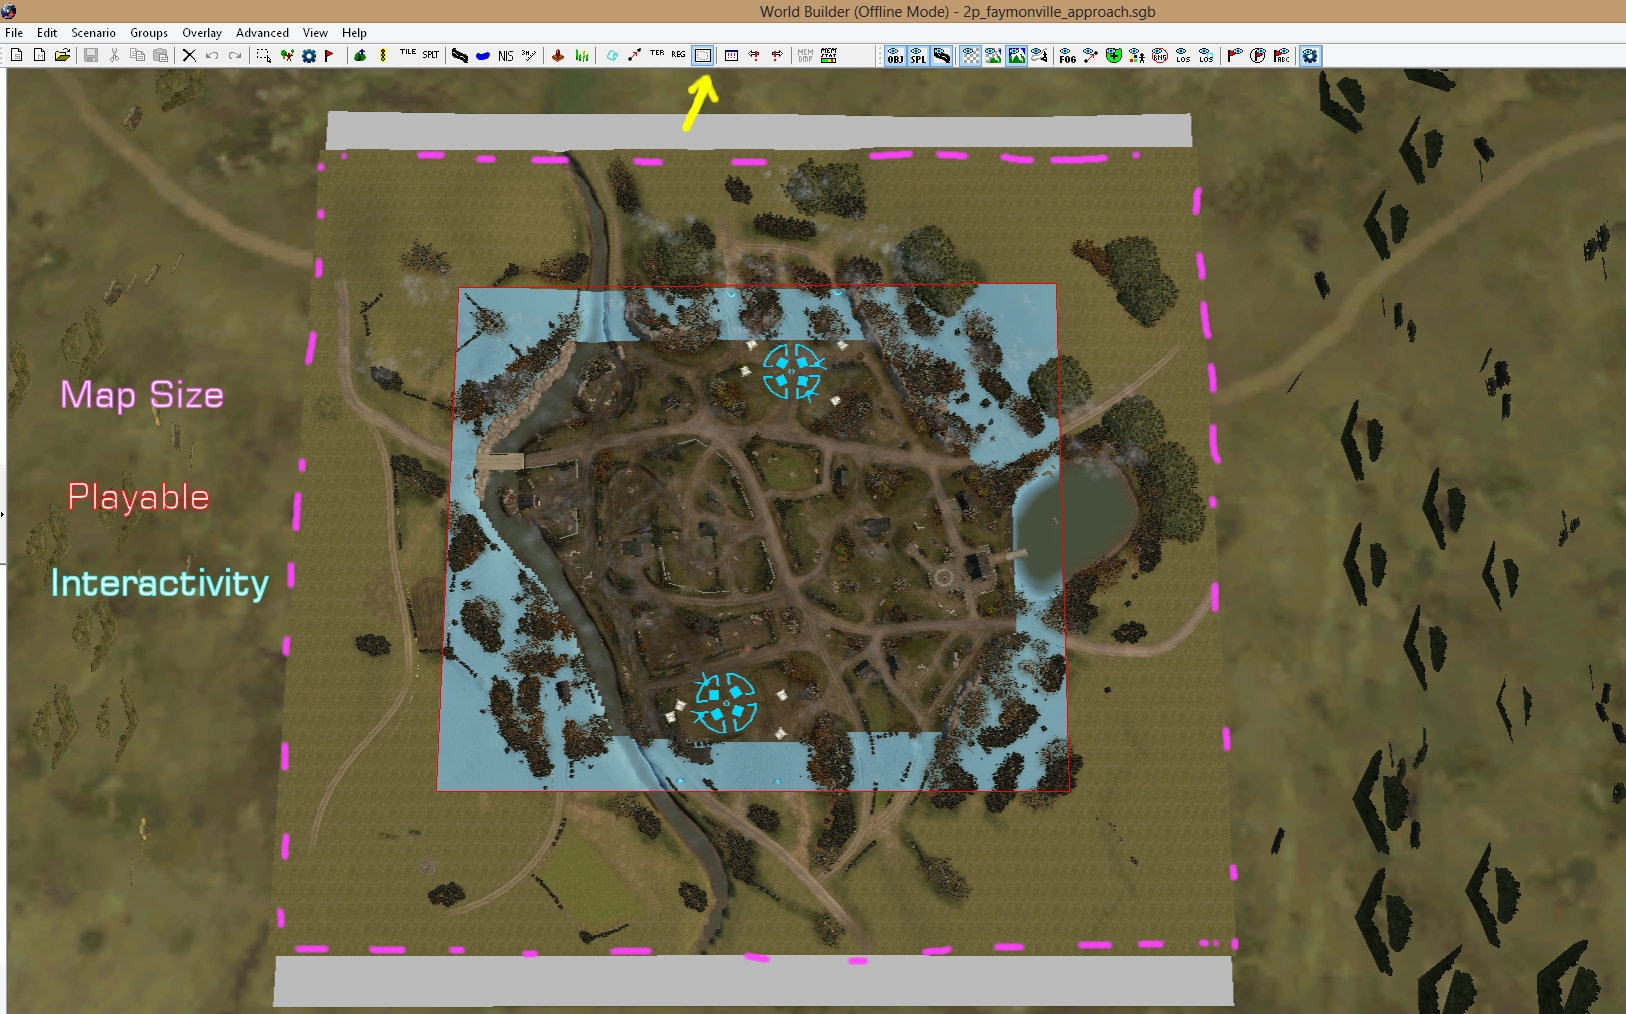
IMPASS EDITOR
- Most objects on the map can be destroyed. Some objects can be crushed by light vehicle. Some by medium vehicles, etc. If you have an area you NEVER want units to go to, use the IMPASS editor to paint the area. Each cell you paint is 1 meter.
- Impass is usually only used around large groves, cliffs, or water areas that have jagged impass sections that will cause units to path badly. For groves there are sometimes empty areas between objects where units could be dropped in that will cause them to get trapped. Paint these "holes" with impass.
- Paint the entire out of bounds area (EXCEPT THE MAP ENTRY POINTS) with IMPASS, or units will spawn off map and travel around in the OOB area then pop out at some random spot.
SPECIAL EFFECTS
- On the toolbar select RENDER MARKER PROX. Then switch to ACTION MARKER mode on the right side menu.
- From here you can place SFX objects such as smoke, fire, sounds, etc.
PATHING
- You can see how well units will path on your map by selecting main menu item OVERLAY -> DRAW OVERLAY MAP -> DRAW PRECISE MAP. Infantry only need 1 meter to path, 3 for light-med vehicles, and 5 for heavies. Units will path poorly, but will path. More is always better.
- Select OBJECT mode, then select from the menu OVERLAY -> SET PASS TYPE. From here you have options to show items desctructible by light, medium, and heavy vehicles.
- Overlay heavy with all objects and splines turned off is a good way to find errors in your terrain. If you paint terrain height and miss smoothing a spot, you end up with an impassable step that is sometimes hidden under objects.
MEASUREMENT RULER
- On the menu toolbar look for the icon 3M with a ruler by it. This tool is invaluable when balancing a map for distance.
- You can measure object to object or terrain point to terrain point (preferred).
- If the path has too many obstacles to get around it will fail to calc. When this happens try measuring from the opposite direction.
MINIMAP AND LOAD SCREEN
These files seem to have changed over the years as COH2 developed. These are the current states as this is written. These files get automatically packaged when you EXPORT your map
- The loading screen is usually a 1920x1080 TGA image that is named mapname_loading_background.TGA. This image is sometimes saved as a DirectDraw surface file DDS.
- The minimap is very complicated if your map is not square.
- The worldbuilder creates a generic minimap called mapname_mm.tga. You can Edit/Replace this file to create a custom minimap. However, this file gets overwritten every time you export your map. So it is recommended you do not use it alone as the minimap.
- From the default minimap, create a large version of your minimap and save it as mapname_mm_low.tga. Square maps will be 768x768 pixels. Usually 768 is the largest side of the map. This is the image used for both the small and large on-screen minimaps.
- Optionally you can create a small version that is shown in menu when selecting a map. This version is usually based on 384x384 pixels (50% of 768 so it shrinks cleanly). Save this as mapnam_mm_preview.tga.
- There is also a mapname_mm_high.tga file that does not appear to be used anywhere in game. I assume it used to be the large fullscreen version of the minimap.
NOTE: TGA files have four layers R,G,B colors and Alpha. If your TGA file is black or missing sections it is because the alpha layer is saying the image is see thru. Edit the file in a paint program that can deal with the alpha layer. Saving as DDS from a bitmap or Jpeg creates a file with NO alpha layer so it should always show up better. As of this writing a free program called Paint.Net works very well for saving DDS files.
--------------------------------------------------------------------------------------
To get more detailed information start here:
https://www.coh2.org/topic/10409/map-making-tutorial-index
To get a quick look at terrain detailing using textures, splines, grass etc:
https://www.coh2.org/guides/12949/introduction-to-map-detailing
And checkout MonolithicBacons video tutorial series on YouTube:
https://www.youtube.com/watch?v=2VeF9B8Kg-Q&list=PLvzocEKMQAnJZWt63NBtfXiKpDLLDnIDq
If you are making an automatch level map, you can mitigate issues by reading this post:
https://www.coh2.org/topic/93403/automatch-map-making-check-list
For a quick reference on sight blocking entities, check this post:
https://www.coh2.org/topic/84517/welcome-to-the-world-of-sight-blockers


 cblanco ★
  보드카 중대
  VonManteuffel
  Heartless Jäger